

I've been working on my audio project, and a part of that was to treat the doors to reduce road noise. The overall noisiness of the Accord has always bothered me whether it's wind noise on the highway or just general road noise driving through town. I figured since I was going to spend a bunch of dollars on a nice audio system, I'd spend a few more to reduce outside noise infiltration. The general philosophy behind the methods I used can been seen at sounddeadenershowdown.com. Note: I didn't use that guy's products, I found everything else cheaper elsewhere, but his website has a wealth of useful information.
This obviously isn't in the factory service manual, so do this to your car at your own risk.
Materials:
Fat Mat by Mega Mat (note this is a butyl product, not asphalt)
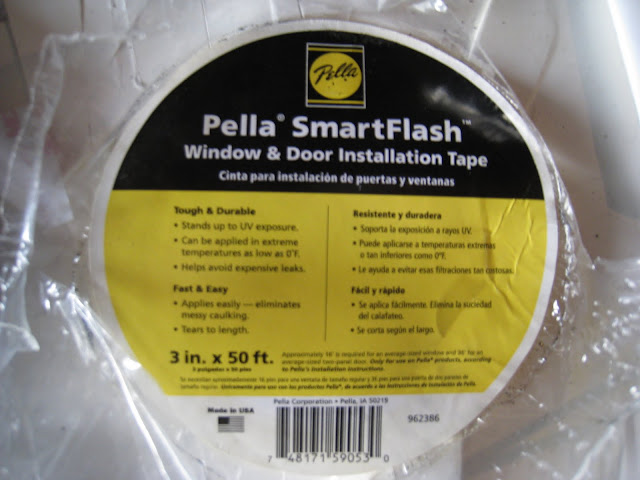
Pella Smartflash window/door flashing tape (essentially the same thing as the Fat Mat, only thinner (and much much cheaper)
roll of Aluminum Roof Flashing
roll of Mass Loaded Vinyl
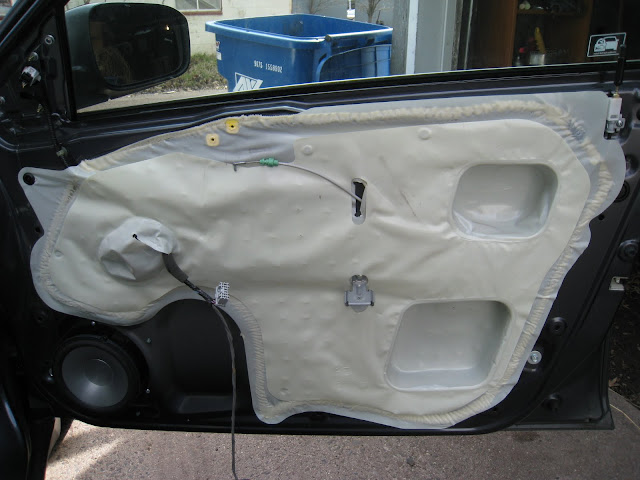
Step one: remove the door card. See the sticky in this forum for instructions.
This is what you'll find:
![Image]()
Step two: cut off the factory vapor barrier. Mine was held on with a foam type adhesive and it wasn't necessary to remove every bit of it. If you have butyl adhesive on yours, you might want to clean it off.
![Image]()
Now we have access to the outer door skin to apply some dampener. I did about 25% coverage give or take. Use a small wooden roller to make sure it's stuck on good, as air bubbles will reduce it's effectiveness. Also, expect to get grease from the window mechanism on your hand/arm/sleeves when your reach into those holes.
I cut 6" wide strips to fit in between the crash bars.
![Image]()
![Image]()
![Image]()
Now, for several reasons, we have to seal those access holes up. First, the factory vapor barrier was there for a reason, to keep water out of the car. Second, those big holes let a lot of noise in the car. Third, the holes reduce the sound quality of the door mounted speaker.
Take some copy/printer paper and make templates for the covers you're going to make for the access holes.
![Image]()
![Image]()
![Image]()
Lay out your templates on the aluminum flashing and trace with a sharpie.
![Image]()
![Image]()
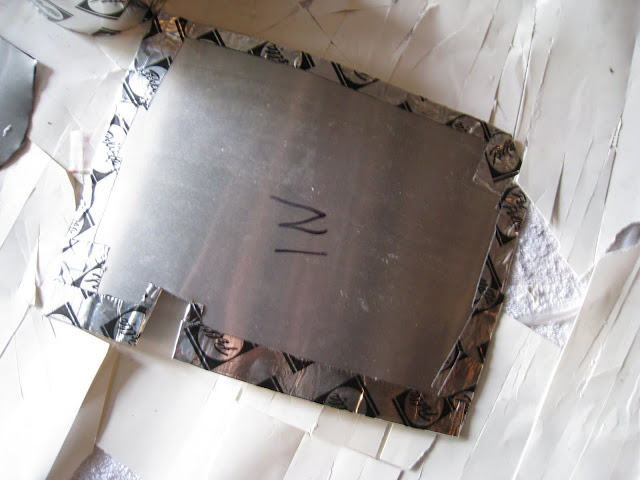
Then cut them out with tin snips. Be careful, the edges are VERY sharp. Hold them up to the door to check for fit. Mark the inside. Also, mark if you have to make additional cuts to allow for wires passing from the inner to outer door.
![Image]()
The aluminum is going to be somewhat flimsy and very resonate. This is where the Pella Smartflash comes in, I got this stuff at Lowes. It was the only flashing product that had both the aluminum face and butyl adhesive (i.e. same basic stuff as the dampener). I could have used my dampener for this purpose, but the flashing tape is much cheaper per sq ft. Also, since it's specifically made for flashing doors/windows I know that it will prevent water infiltration.
![Image]()
Basically, you want to cover the back(out)side of the cover. After it's applied the aluminum will not resonate at all. Note: where I cut for the wire to pass through, I added extra tape around the edges to prevent the wire from rubbing and possibly fraying.
![Image]()
![Image]()
Now to cover the holes. I simply taped the patches on with more flashing tape. Once this stuff bonds, it's on forever - so no worries about it coming off in the door.
![Image]()
![Image]()
For the sake of overkill, I taped the field too to prevent any chance of resonation.
![Image]()
All three access holes covered:
![Image]()
You can just use pieces of the flashing tape to cover all the small holes. Make sure you do not cover over any of the holes for the door card clips.
![Image]()
Add dampener as needed to kill any remaining panel resonations.
![Image]()
The front door cards on the Accord have these foam blocks on them.
![Image]()
The factory vapor barrier had a pocket to accommodate these, but now that we're got the access holes sealed over, they've got to go. Carefully cut off the "ears" with a razor to remove the block.
![Image]()
Now add dampener as needed to kill any resonation in the door card. You can also get rid of the foam remnants
![Image]()
The window switches were buzzing like crazy with the new speakers, so I added some dampener on them as well.
![Image]()
Now the last step is the get your MLV on the door. I found it's easiest to hang it on the door before you reinstall the card. I used a combination of the clips that were holding on the vapor barrier and some strips of velcro. Once the door card is on, it will be held in place with pressure. Take your time to make sure it's properly trimmed as it's a PITA when you get the wires and the door handle cable hooked up only to find you need to trim the MLV a bit. Don't ask me how I know this. This picture was taken before trimming was complete (notice the door handle cable isn't through yet)
![Image]()
Now put the door card back on. I also put a piece of MLV behind the sail panel.
Conclusion:
Were the materials expensive? Yes.
Did this take a lot of time? Yes - 2 hours per door.
Was it worth it? Ab-so-freaking-lutely.
Road noise in the car has greatly been reduced. If I close my eyes (yeah I know, bad idea to close your eyes while driving") ) it's almost like I'm driving a Lexus or a Benz, it's that quiet.
) it's almost like I'm driving a Lexus or a Benz, it's that quiet.
Before I started, I mainly noticed road noise in two places - the front doors and the rear wheel wells. Since the completion of this project, I no longer hear it in those spots ( I also completely did the trunk). The only major source of "outside" noise now is engine noise on acceleration, and that I can live with.
This obviously isn't in the factory service manual, so do this to your car at your own risk.
Materials:
Fat Mat by Mega Mat (note this is a butyl product, not asphalt)
Pella Smartflash window/door flashing tape (essentially the same thing as the Fat Mat, only thinner (and much much cheaper)
roll of Aluminum Roof Flashing
roll of Mass Loaded Vinyl
Step one: remove the door card. See the sticky in this forum for instructions.
This is what you'll find:
Step two: cut off the factory vapor barrier. Mine was held on with a foam type adhesive and it wasn't necessary to remove every bit of it. If you have butyl adhesive on yours, you might want to clean it off.

Now we have access to the outer door skin to apply some dampener. I did about 25% coverage give or take. Use a small wooden roller to make sure it's stuck on good, as air bubbles will reduce it's effectiveness. Also, expect to get grease from the window mechanism on your hand/arm/sleeves when your reach into those holes.
I cut 6" wide strips to fit in between the crash bars.


Now, for several reasons, we have to seal those access holes up. First, the factory vapor barrier was there for a reason, to keep water out of the car. Second, those big holes let a lot of noise in the car. Third, the holes reduce the sound quality of the door mounted speaker.
Take some copy/printer paper and make templates for the covers you're going to make for the access holes.


Lay out your templates on the aluminum flashing and trace with a sharpie.


Then cut them out with tin snips. Be careful, the edges are VERY sharp. Hold them up to the door to check for fit. Mark the inside. Also, mark if you have to make additional cuts to allow for wires passing from the inner to outer door.

The aluminum is going to be somewhat flimsy and very resonate. This is where the Pella Smartflash comes in, I got this stuff at Lowes. It was the only flashing product that had both the aluminum face and butyl adhesive (i.e. same basic stuff as the dampener). I could have used my dampener for this purpose, but the flashing tape is much cheaper per sq ft. Also, since it's specifically made for flashing doors/windows I know that it will prevent water infiltration.
Basically, you want to cover the back(out)side of the cover. After it's applied the aluminum will not resonate at all. Note: where I cut for the wire to pass through, I added extra tape around the edges to prevent the wire from rubbing and possibly fraying.

Now to cover the holes. I simply taped the patches on with more flashing tape. Once this stuff bonds, it's on forever - so no worries about it coming off in the door.


For the sake of overkill, I taped the field too to prevent any chance of resonation.

All three access holes covered:

You can just use pieces of the flashing tape to cover all the small holes. Make sure you do not cover over any of the holes for the door card clips.

Add dampener as needed to kill any remaining panel resonations.

The front door cards on the Accord have these foam blocks on them.

The factory vapor barrier had a pocket to accommodate these, but now that we're got the access holes sealed over, they've got to go. Carefully cut off the "ears" with a razor to remove the block.

Now add dampener as needed to kill any resonation in the door card. You can also get rid of the foam remnants

The window switches were buzzing like crazy with the new speakers, so I added some dampener on them as well.

Now the last step is the get your MLV on the door. I found it's easiest to hang it on the door before you reinstall the card. I used a combination of the clips that were holding on the vapor barrier and some strips of velcro. Once the door card is on, it will be held in place with pressure. Take your time to make sure it's properly trimmed as it's a PITA when you get the wires and the door handle cable hooked up only to find you need to trim the MLV a bit. Don't ask me how I know this. This picture was taken before trimming was complete (notice the door handle cable isn't through yet)

Now put the door card back on. I also put a piece of MLV behind the sail panel.
Conclusion:
Were the materials expensive? Yes.
Did this take a lot of time? Yes - 2 hours per door.
Was it worth it? Ab-so-freaking-lutely.
Road noise in the car has greatly been reduced. If I close my eyes (yeah I know, bad idea to close your eyes while driving
) it's almost like I'm driving a Lexus or a Benz, it's that quiet.Before I started, I mainly noticed road noise in two places - the front doors and the rear wheel wells. Since the completion of this project, I no longer hear it in those spots ( I also completely did the trunk). The only major source of "outside" noise now is engine noise on acceleration, and that I can live with.


