

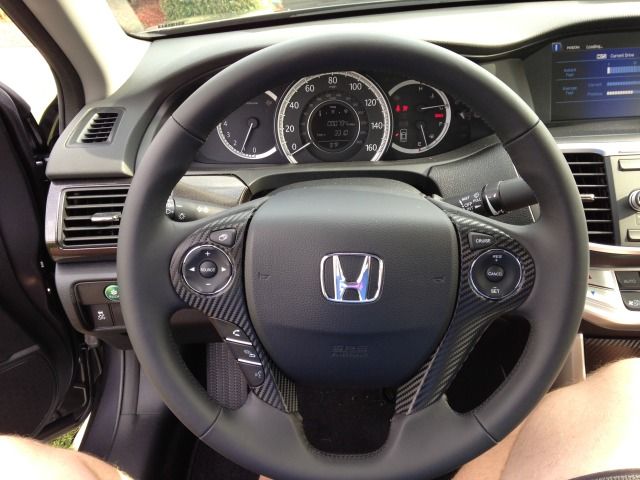
ok, so i could not stand the feel of the plastic steering wheel and for $142 through Majestic Honda, I purchased my leather steering wheel here.
http://www.hondaautomotiveparts.com/auto/jsp/mws/prddisplay.jsp?inputstate=5&catcgry1=ACCORD&catcgry2=2013&catcgry3=4DR+TOUR+%28V6%29&catcgry4=KA6AT&catcgry5=STEERING+WHEEL+%28SRS%29
I am not responsible for any damage to you and your car. Do at your own risk.
ok, so first thing to remember… do not have the battery connected at any time that you have the airbag out, as it will trip the airbag warning light which the dealer will have to reset.
Step 1: with the car off and key removed from the ignition, turn the wheel until the column locks. You will see why when trying to remove the center bolt holding it on.
Step 2: Now disconnect neg/ground terminal on the battery. (Do not do this until you do step 1 or the column will not lock.)
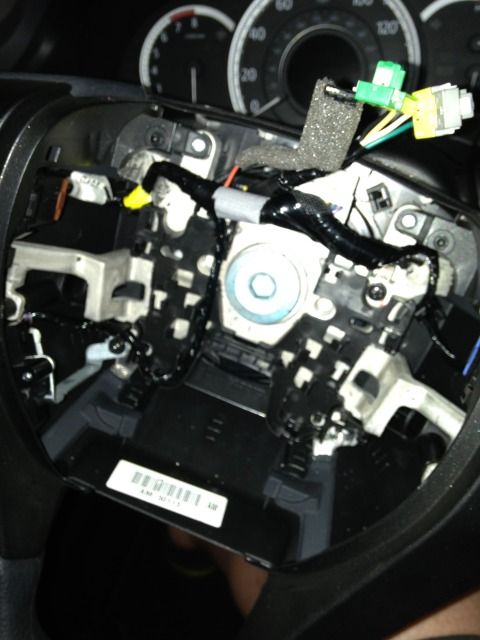
Step 3: you will need a T30 torx bit. (I've already removed the screws but here is where they were) Remove the torx screws on both sides to free the airbag.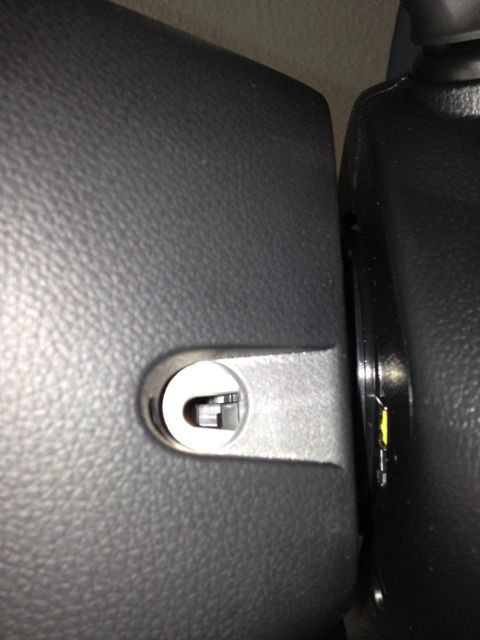
Step 4: The airbag module will be free but you still have 3 plugs to remove.
 the black(this one is the horn) on at the top was kind of tricky because the foam rubber was hiding the release button. you'll have to feel for it. it is a small ridge towards the middle of the connector. next, you have the yellow and green ones on the back of the airbag. these were kind of tricky too. you will see the white little "wing" tabs on both sides of each connector. pull up on those at the same time and it should release each plug
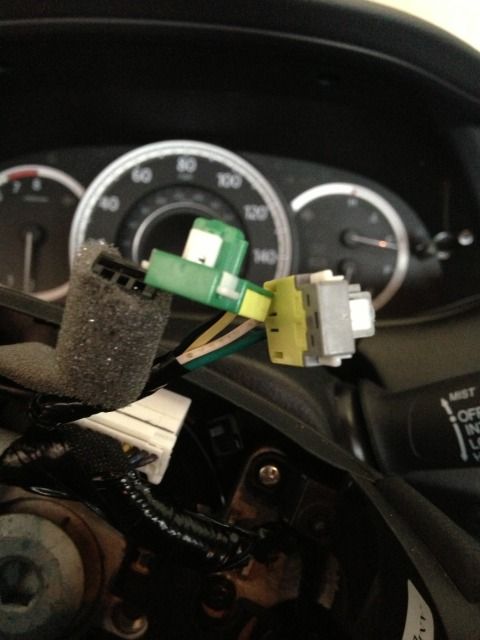
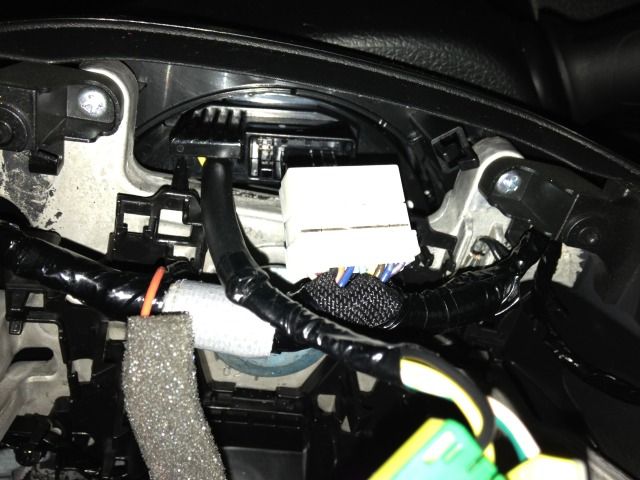
You also want to unplug the long white harness from the upper portion that is plugged into the column.
Step 5: carefully place the airbag in a safe place outside the car. i always lay face up just for any freak incident of deployment, it isnt a projectile. as long as you handle it with care you'll be fine.
Step 6: You'll need a breaker bar and a 10MM Hex bit socket. If you dont have one, here is what i bought from home depot.http://www.homedepot.com/p/Husky-3-8-in-Drive-10mm-Hex-Bit-Socket-H3DHBS10MM/202913545#.UfEtKHrFFhA. You'll probably have to put a good bit of @$$ into it; its on there good.
Step 7: Take a picture of the wheel so you know what angle it replace the new one, as there is no master spline to help you line it up. the wheel should be free, just be careful as the airbag wires will fish out of the top opening of the wheel. You also want to be very careful not to pull apart the spool.
Step 8: Once the wheel is out, you are going to transfer everything to your new wheel. You will a silver screw at the top left and right holding the corner of the button trim plates. remove those and now you should be able to unsnap the back cover off of the wheel.
Step 9: there are four more screws on the back side. remove those and keep them seperate from the first two.
Step 10: there is a black screw at the lower left that is holding a bracket connected to the trim piece. there is another black screw on the right side grounding a wire for the horn. remove those
Step 11: everything left inside the wheel should come loose with a little finagling.
Installation reverse of removal.
(i decided to 3M wrap the button trim pieces while they were out.)
http://www.hondaautomotiveparts.com/auto/jsp/mws/prddisplay.jsp?inputstate=5&catcgry1=ACCORD&catcgry2=2013&catcgry3=4DR+TOUR+%28V6%29&catcgry4=KA6AT&catcgry5=STEERING+WHEEL+%28SRS%29
I am not responsible for any damage to you and your car. Do at your own risk.
ok, so first thing to remember… do not have the battery connected at any time that you have the airbag out, as it will trip the airbag warning light which the dealer will have to reset.
Step 1: with the car off and key removed from the ignition, turn the wheel until the column locks. You will see why when trying to remove the center bolt holding it on.
Step 2: Now disconnect neg/ground terminal on the battery. (Do not do this until you do step 1 or the column will not lock.)
Step 3: you will need a T30 torx bit. (I've already removed the screws but here is where they were) Remove the torx screws on both sides to free the airbag.

Step 4: The airbag module will be free but you still have 3 plugs to remove.
 the black(this one is the horn) on at the top was kind of tricky because the foam rubber was hiding the release button. you'll have to feel for it. it is a small ridge towards the middle of the connector. next, you have the yellow and green ones on the back of the airbag. these were kind of tricky too. you will see the white little "wing" tabs on both sides of each connector. pull up on those at the same time and it should release each plug
You also want to unplug the long white harness from the upper portion that is plugged into the column.

Step 5: carefully place the airbag in a safe place outside the car. i always lay face up just for any freak incident of deployment, it isnt a projectile. as long as you handle it with care you'll be fine.
Step 6: You'll need a breaker bar and a 10MM Hex bit socket. If you dont have one, here is what i bought from home depot.http://www.homedepot.com/p/Husky-3-8-in-Drive-10mm-Hex-Bit-Socket-H3DHBS10MM/202913545#.UfEtKHrFFhA. You'll probably have to put a good bit of @$$ into it; its on there good.
Step 7: Take a picture of the wheel so you know what angle it replace the new one, as there is no master spline to help you line it up. the wheel should be free, just be careful as the airbag wires will fish out of the top opening of the wheel. You also want to be very careful not to pull apart the spool.
Step 8: Once the wheel is out, you are going to transfer everything to your new wheel. You will a silver screw at the top left and right holding the corner of the button trim plates. remove those and now you should be able to unsnap the back cover off of the wheel.
Step 9: there are four more screws on the back side. remove those and keep them seperate from the first two.
Step 10: there is a black screw at the lower left that is holding a bracket connected to the trim piece. there is another black screw on the right side grounding a wire for the horn. remove those
Step 11: everything left inside the wheel should come loose with a little finagling.
Installation reverse of removal.

(i decided to 3M wrap the button trim pieces while they were out.)


